Friday, September 30, 2011

Friday Funnies!

Who is SOOOO happy that it's FRIDAY?!?! My best friend and her family are here visiting for the weekend and this girl makes me LAUGH!!!! Just in case you need a laugh too, I'm back with some more Friday Funnies to get your weekend off to a happy start! Sit back, relax and remember to laugh-life's too short not to! Enjoy!

(As always, these can be found on my pinterest board here!)

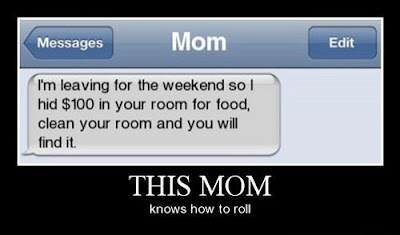
Guilty!


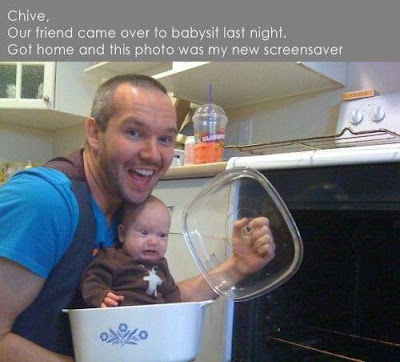
SOOO True! See...


Maybe this is why...


Totally doing this one day!!! ha ha!



You go girl! Or guy. I can't actually tell.


Yep...turkey on white please.



Oooooh snap!


I may or may not have crossed that line.

Wise wise words:


So don't worry about that spilt cup (or whole gallon) of milk on the floor, the crayon on the wall, or the smudge-prints on your freshly cleaned bathroom mirrors. Afterall, do we really need to add a headache to our day?! Laughing is so much easier on the soul!

Thanks for stopping by today, I hoped you laughed! Be sure to come back on Monday for the start of October MaDdNEsS here at Love Sweet Love! A whole month full of easy, quick, and cheap DIY halloween crafts, treats, etc! See ya soon!
Monday, September 26, 2011

October MaDnESs and a "BOO" Rag Wreath!!!

As I've mentioned before-as well as the whole reason this blog was started-I LOVE holiday decorating! I get so giddy in September just knowing that the next 6 months are PACKED full of holidays to create, display, craft, cook and eat for! I really started getting into creating projects, decorating for holidays, and crafting with my kids last September-for Halloween, and wanted to do something to celebrate my year anniversary of CREATING! What better way than to dedicate my whole month of October to Halloween FuuuuN! Every day of October (mon-fri-those are my blog days :) ), will be a different Halloween craft, party idea, costume idea, yummy treats, etc that I have done. You won't want to miss my October MaDnESs so be sure to check back starting Oct. 3rd for non-stop easy, cheap, FUN DIY Halloween ideas!!!

I've also mentioned before, I feel that if you do nothing else to decorate for a holiday, you can at least make a wreath! Indoor, outdoor, bedroom door, pantry door-it doesn't matter! Just get one up and I guarantee it'll be just the thing to get you in the holiday spirit and will give a little somethin' somethin' extra to your home. So I though to officially kick off my OCTOBER MADNESS event, I'd share my first Halloween craft with you a week early so you have plenty of time to get in the spirit! I love rag wreaths, and I think the spunky, fun style is perfect for a holiday like Halloween!


To start I picked up a 15" foam wreath from Hobby Lobby, (Using a 40% off coupon it was $3) as well as a couple different halloween fabrics and some purple, orange and green tulle (I got about 1/2 yard of each fabric so I could have enough left over to do another project-coming SOON! :) )


I just cut the fabric into strips of about 1X9...


...and started tying them around the wreath frame until...


...she was full! I then went through and added strips of each color tulle all throughout (and the strips of tulle are longer than the fabric strips because I wanted them to give off a wispy look) until I was happy with whole look!


I still felt it needed a little more spunk so I picked up these cheap wood letter from H.L. (.99 for 2 letters) and painted them with a purple acrylic paint I already had. (Ignore the silver glitter paint in the picture since she ruined my letter "B" and I had to make a new one-good idea gone bad, oh well!)


I had inteded to make the purple letters appear shimmery (that was what I was trying to do with the silver glitter paint) but that turned out to be a bust so I dug through some craft stuff and found these wiggly eyes and thought they'd add the perfect touch of fun to the wreath since one of the fabrics I used had googly eyes all over it (as well as the little critters I added at the end!)


I thought adding them to the B would be a bit much, so I decided to use some of the purple and green tulle that I used on the wreath and tie it to the edge of the letter. And just because almost every project I do has a little bling :) I added these small purple jewels I had just using hot glue.


I hot glued the edges of all the letters together to create the word "BOO"!


Using a tip I found here, I hot glued a bobby pin to the back of the letter B...


...and pinned it directly onto the "rags"! SO easy and it holds it right in place!


I also picked these little guys up at H.L. (they were picks that I just took the pick part out of) and stuck them on.


And tied the whole thing onto the door with some fun $ store ribbon!


Now enjoy!


Thanks so much for coming on over today and helping me kick off OCTOBER MaDnESs! I'm SO ready for Halloween...what about you?! Are you the wreath making or the wreath buying type?

Linking up to THESE parties as well as:
The DIY Show Off
Photobucket

Friday, September 23, 2011

Friday Funnies!

Haaaaappppyyyy FRIDAY!!! I thought I'd kick the weekend off for you with another round of Friday Funnies to get you off on the right foot on this beautiful FIRST day of FALL! So grab a treat, take a seat and get ready to...


Enjoy my friends! (all pics can be found on my Have a Laugh pinboard on pinterest!)


Now go have a good day and laugh a little will ya!!! Who knows WHAT ill's you'll cure :)

I'm so excited to put my Halloween stuff up I can barely stand it and my kids are BEGGING me to do so, so I think this weekend it's all going up cause I just can't wait any longer! Pictures, tutorials, ideas, yummy treats and more coming soon!

Wednesday, September 21, 2011

Lemon/Lime Centerpiece

When life gives you lemons, make lemonade...or a centerpiece!


Ever since I made my Family Rules Canvases a year ago...


...I've been wanting to make a centerpiece for my kitchen table that helped tie the canvases into the kitchen. Being that the colors I chose for the Rules/Values were summery colors it finally hit me...during the summer, decorate with limes and lemons! Yippee!

I know I know, summer is OVER :(....SOOO as my last tribute to summertime, fresh fruit galore, and warm, carefree days, I thought I'd share some pictures and a quick "how-to" for my sweet little centerpiece that has brought a smile to my face every day for the last 3 months (it's the simple things in life people mmmkay.) Not to mention it's about to get the boot to make way for some spOOktacular halloween fun!!!!

Whatchya need:

1. Glass candlestick from the dollar store
2. Large platter of some sort...mine was $2 at the thrift store
3. Vase of any shape or size!...mine was $1 from the thrift store
4. Fruit that coordinates with your kitchen (I think oranges and limes would be super duper cute too!) and it can be fresh or fake. I used both throughout the summer, but when I didn't have any fresh available my fake fruit is from the $store! In the pictures here the limes are fake and the lemons are real. :)
5. SUPER strong glue...I use E6000

Can we just stop for a second and eat up the yumminess that is this platter. When I bought it, it was a scratched up, dinged up, silver plated thing o' beauty. But I took one look at those beautiful curved edges and knew this baby was coming home with me. After a pretty coat of summer squash spray paint (Rustoleum) she was EXACTLY what I envisioned she would turn out to be...


Using my E6000 I glued the platter to the candlestick, and once that dried, then glued the vase to the platter directly on top of where the candlestick was to give it a good, sturdy support base.


Next I filled her up with limes...


...hugged her with lemons


And thanked my lucky stars it didn't all come a tumblin' down! :)


Easy Peasey Lemon Squeezy! (hehe)

Thanks for stopping by today! Do you have your Halloween decor up yet?! I've been crafting away and I'm SoOoO anxious to put it all up!

Linking up to these great parties as well as:
PhotobucketPhotobucket